B.O.L.T (Ball - Oriented Localisation Tech)
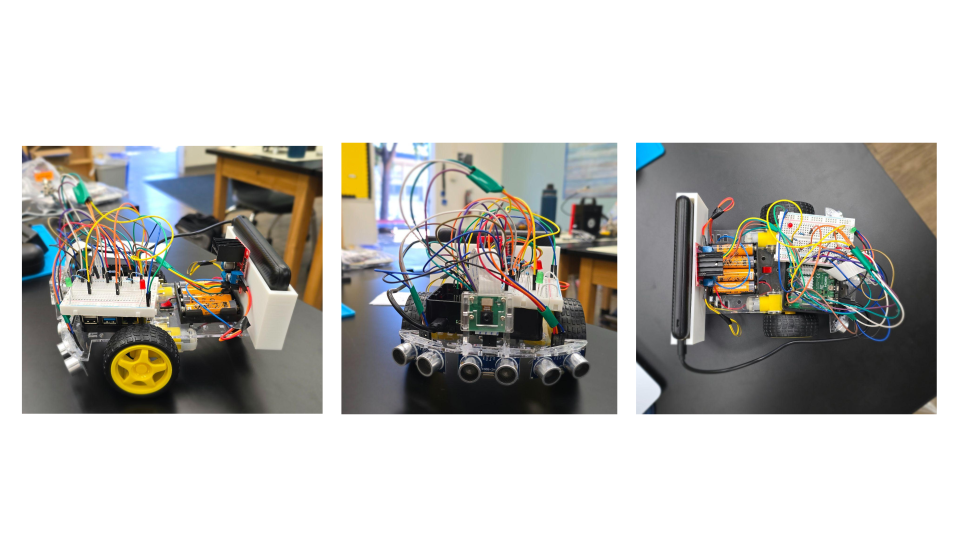
The Ball Tracking Robot is an autonomous computer vision powered rover engineered to lock onto and dynamically follow a moving ball in real time. I am interested in this to learn about Raspberry Pi and use python to command the different components to work how I desire. I chose to do this project to learn about raspberry pi and python.
| Engineer | School | Area of Interest | Grade |
|---|---|---|---|
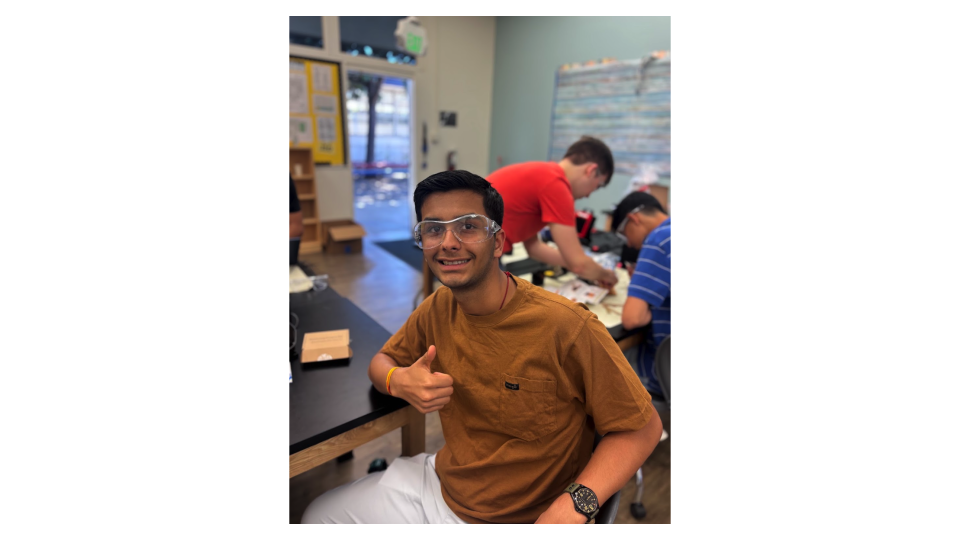
| Twanshu K. | Irvington HS | Electrical Engineering | Incoming Senior |
Third Milestone
Summary
For my third milestone I have fully coded the robot, and having it working with every component. Since my last milestone, I have had the the motors go forward toward the red ball. I have set the motors to move forward, right, or left depending on where the ball is in the camera frame. I have also made the robot spin to left in one spot in order to find the red ball. The robot is also using the ultrasonic sensors to detect obstacles and manuver them. Whenever there is an obstacle detected it moves backward, and then right.
Challanges
This milestone came with my biggest challange yet. My raspberry pi got completely reset. I had to redownload the os and I had all of my codes were erased from it. Fortunetly, I had documented my code, so I just had to download the cv2 (camera software) and flask (camera streaming software). After getting to my second milestone, in my full code the ultrasonic sensors didn’t let the code run. In order to resolve this issue I rewired all the ultrasonic sensors, and I tested them individually. Then I ran my complete code and it was working.
Code
This is the full code for the robot with flask stream.
import cv2
import numpy as np
import threading
import time
from flask import Flask, render_template_string, Response
from picamera2 import Picamera2
import RPi.GPIO as GPIO
from gpiozero import DistanceSensor, Motor

app = Flask(__name__)

# 1. HARDWARE SETUP

GPIO.setmode(GPIO.BOARD)

# Distance Sensors
# Note: gpiozero measures distance in meters. The HC-SR04 max range is ~4m.
ultrasonic_right = DistanceSensor(echo=17, trigger=4, max_distance=10, threshold_distance=0.2)
ultrasonic_front = DistanceSensor(echo=9, trigger=10, max_distance=10, threshold_distance=0.2)
ultrasonic_left = DistanceSensor(echo=22, trigger=27, max_distance=10, threshold_distance=0.2)

# Motors
motor_left = Motor(forward=23, backward=24)
motor_right = Motor(forward=26, backward=16)

# Initialize Picamera2
picam2 = Picamera2()
# Using BGR888 directly so OpenCV can process it natively without color-space mismatches
config = picam2.create_video_configuration(main={'format': 'RGB888', 'size': (1280, 720)})
picam2.configure(config)
picam2.start()

# 2. GLOBAL VARIABLES FOR THREADING

global_frame = None
frame_lock = threading.Lock()

# Minimum contour area to count as a real detection (not noise)
MIN_AREA = 500
MAX_AREA = 250000

# Obstacle avoidance: distance (meters) below which something is "too close"
OBSTACLE_DISTANCE = 0.1

# 3. MOTOR CONTROL FUNCTIONS

def move_forward():
    motor_left.forward(0.7)
    motor_right.forward(0.7)

def stop_move():
    motor_left.stop()
    motor_right.stop()

def move_left():
    motor_left.backward(0.2)
    motor_right.forward(0.4)

def move_right():
    motor_left.forward(0.4)
    motor_right.backward(0.2)

def move_backward():
    motor_left.backward(0.75)
    motor_right.backward(0.75)

def spin_search():
    """Rotate in place (no forward/backward drift) to scan for the ball."""
    motor_left.forward(0.4)
    motor_right.backward(0.4)

def avoid_obstacle():
    """Stop, back up a bit, then turn right, out of the way of an obstacle.

    This is a short blocking sequence (~1 second total). The camera feed
    will pause briefly during this maneuver, which is an acceptable
    trade-off for keeping the avoidance logic simple and reliable.
    """
    stop_move()
    time.sleep(0.1)

    move_backward()
    time.sleep(0.5)
    stop_move()
    time.sleep(0.1)

    move_right()
    time.sleep(0.4)
    stop_move()


# 4. BACKGROUND TASK: CAMERA & ROBOT LOGIC

def control_loop():
    global global_frame

    # Define range of red color in HSV
    lower_red = np.array([155, 80, 80])
    upper_red = np.array([179, 255, 255])

    while True:
        # Capture frame
        frame = picam2.capture_array()

        # Convert to HSV for tracking
        hsv = cv2.cvtColor(frame, cv2.COLOR_BGR2HSV)
        mask = cv2.inRange(hsv, lower_red, upper_red)

        # Find contours on the mask
        contours, _ = cv2.findContours(mask, cv2.RETR_EXTERNAL, cv2.CHAIN_APPROX_SIMPLE)

        x_cord = 0
        area = 0

        # Process ONLY the largest contour
        if contours:
            largest_contour = max(contours, key=cv2.contourArea)
            area = cv2.contourArea(largest_contour)

            # Minimum size threshold to avoid tracking tiny specs of noise
            if area > MIN_AREA:
                # Draw the bounding box
                x, y, w, h = cv2.boundingRect(largest_contour)
                cv2.rectangle(frame, (x, y), (x + w, y + h), (0, 255, 0), 3)

                # Calculate exact center
                M = cv2.moments(largest_contour)
                if M["m00"] != 0:
                    x_cord = int(M["m10"] / M["m00"])
                    y_cord = int(M["m01"] / M["m00"])

                    # Draw a small blue circle at the center
                    cv2.circle(frame, (x_cord, y_cord), 5, (255, 0, 0), -1)

        # Safely update the global frame so Flask can read it
        with frame_lock:
            global_frame = frame.copy()

        # Obstacle check (highest priority, overrides ball tracking)
        front_dist = ultrasonic_front.distance
        left_dist = ultrasonic_left.distance
        right_dist = ultrasonic_right.distance

        obstacle_detected = (
            front_dist < OBSTACLE_DISTANCE
            or left_dist < OBSTACLE_DISTANCE
            or right_dist < OBSTACLE_DISTANCE
        )

        # --- Robot Movement Logic ---
        # These three branches are mutually exclusive, so exactly one motor
        # command is issued per loop iteration (no command gets silently
        # overwritten by a later one in the same cycle).
        if obstacle_detected:
            # Something is too close: back off and reorient, then resume
            # searching next cycle.
            avoid_obstacle()
        elif MIN_AREA < area < MAX_AREA:
            # Ball locked on: steer/drive toward it.
            if x_cord > 900 or x_cord < 400:
                if x_cord > 840:
                    move_left()
                else:
                    move_right()
            else:
                move_forward()
        else:
            # No ball in view: spin in place. Because this runs every
            # iteration of the loop (every ~20ms) whenever the ball isn't
            # locked on, the robot effectively spins continuously until
            # red is spotted again.
            spin_search()

        # Tiny sleep to prevent this loop from maxing out the Raspberry Pi's CPU
        time.sleep(0.02)

# ==========================================
# 5. FLASK WEB SERVER ROUTES
# ==========================================
def generate_frames():
    global global_frame
    while True:
        # Safely grab the latest frame from the background thread
        with frame_lock:
            if global_frame is None:
                time.sleep(0.05)
                continue
            current_frame = global_frame.copy()

        # Encode the frame as JPEG
        success, buffer = cv2.imencode('.jpg', current_frame)
        if not success:
            continue

        # Yield frame in MJPEG format
        yield (b'--frame\r\n'
               b'Content-Type: image/jpeg\r\n\r\n' + buffer.tobytes() + b'\r\n')

        # Limit the stream framerate to save Wi-Fi bandwidth
        time.sleep(0.05)

@app.route('/')
def index():
    return render_template_string('''
        <html>
          <head>
            <title>Raspberry Pi Live Stream</title>
          </head>
          <body>
            <h1>Raspberry Pi Camera Live Feed</h1>
            <img src="" width="640" height="480">
          </body>
        </html>
    ''')

@app.route('/video_feed')
def video_feed():
    return Response(generate_frames(), mimetype='multipart/x-mixed-replace; boundary=frame')


# 6. MAIN EXECUTION

if __name__ == '__main__':
    try:
        # Start the camera/motor control loop as a background thread
        logic_thread = threading.Thread(target=control_loop, daemon=True)
        logic_thread.start()

        # Start the Flask server on the main thread
        app.run(host='0.0.0.0', port=5000, threaded=True)
    finally:
        stop_move()
        picam2.stop()
        print("\nHardware modules cleanly disconnected.")
Second Milestone
Summary
This milestone was a crucial part of my project, since I got a significant portion of my software done for this milestone. The code has to different shades of red noted in RGB, and any red that the Pi camera sees within that range of colors, it checks for the largest area of red pixels. Then after it identifies and makes a square around the object with the biggest area of red pixels (ball), it also makes a blue point in the middle of the object and gives the coordinates. I also permenently mounted my ultrasonic sensors in the front of my car chassis.
Challenges
In milestone 2, along with this massive progress cam a lot of setbacks. My goal for this milestone was to make the Pi camera be able to detect red color, and also a circle. But, everytime I tried to identify the circularity it don’t detect the ball. I kept testing with different lengths for circuarity, and it never worked. Later, I resovled this problem by making the camera detect the largest area of red pixels instead of making it also detect a circle.
Code
This is the code for detecting a the largest area of red pixels
import cv2
import numpy as np
from picamera2 import Picamera2

def main():
    # Initialize and configure Picamera2
    picam2 = Picamera2()
    config = picam2.create_video_configuration(main={'format': 'RGB888', 'size': (1280, 720)})
    picam2.configure(config)
    picam2.start()

    print("Starting object tracking. Press 'q' in the video window to quit.")

    try:
        while True:
            # 1. Capture frame
            frame = picam2.capture_array()

            # 2. Convert to HSV for tracking
            hsv = cv2.cvtColor(frame, cv2.COLOR_BGR2HSV)

            # 3. Define range of red color in HSV and threshold
            lower_red = np.array([155, 80, 80])
            upper_red = np.array([179, 255, 255])
            mask = cv2.inRange(hsv, lower_red, upper_red)

            # 4. Find contours on the mask
            contours, _ = cv2.findContours(mask, cv2.RETR_EXTERNAL, cv2.CHAIN_APPROX_SIMPLE)

            # 5. Process ONLY the largest contour
            if contours:
                # Find the single largest contour in the list by area
                largest_contour = max(contours, key=cv2.contourArea)

                # Check if it meets the minimum size threshold
                if cv2.contourArea(largest_contour) > 500:

                    # Draw the bounding box for ONLY this largest contour
                    x, y, w, h = cv2.boundingRect(largest_contour)
                    cv2.rectangle(frame, (x, y), (x + w, y + h), (0, 255, 0), 3)

                    # Calculate the exact center using Image Moments
                    M = cv2.moments(largest_contour)
                    if M["m00"] != 0: # Prevent division by zero
                        x_cord = int(M["m10"] / M["m00"])
                        y_cord = int(M["m01"] / M["m00"])

                        # Draw a small blue circle at the center of the tracked object
                        cv2.circle(frame, (x_cord, y_cord), 5, (255, 0, 0), -1)
                        print(f"Tracking coordinates: X={x_cord}, Y={y_cord}")

            # 6. Display the processed frame locally
            cv2.imshow('Red Object Tracking', frame)

            # 7. Break the loop if the 'q' key is pressed
            if cv2.waitKey(1) & 0xFF == ord('q'):
                break

    finally:
        # Clean up resources properly when exiting
        picam2.stop()
        cv2.destroyAllWindows()
        print("Stream stopped and resources released.")

if __name__ == '__main__':
    main()
First Milestone
Summary
The ultimate objective for this robot is to be able to find the largest area of red pixels seen by the PiCamera with Python code using the OpenCV library. Until the first milestone, I built the basic structure and placement of the components of my robot, set up my Raspberry Pi minicomputer, wired my two motors to the L298N motor driver board and to a power source, and finally wrote some simple lines of code to test the functionality of my DC motors.
Challenges
The biggest challange I faced was setting up my Raspberry Pi, I resolved it by downloading imager and replcing the current raspberry os with the one installed by imager. Another major challange I faced was the wire management I connected all the wires without putting the breadboard and Raspberry Pi on the car, so I remedied this issue by placing my breadboard on the batteries, Raspberry Pi in the middle and having the ultrasonic sensors in the front.
Schematics
Code
Basic code to have the motors running
# Basic Python Motor Code
import RPi.GPIO as GPIO
import time

# Use Broadcom (BCM) pin numbering layout (uses GPIO number instead of physical pin number)
GPIO.setmode(GPIO.BCM)


# PIN CONFIGURATION
# The following are the names of the raspberry-pi pins that control each motor

# Left Motor direction pins
MOTOR1B = 23
MOTOR1E = 24

# Right Motor direction pins
MOTOR2B = 16
MOTOR2E = 26

# Speed Control Pins (Enable pins on the motor driver)
ena = 25  # Enable A - controls Left Motor speed
enb = 12  # Enable B - controls Right Motor speed


# --- GPIO SETUP ---
# Configure all the motor control pins as outputs so we can send signals to them
GPIO.setup(MOTOR1B, GPIO.OUT)
GPIO.setup(MOTOR1E, GPIO.OUT)
GPIO.setup(ena, GPIO.OUT)
GPIO.setup(MOTOR2B, GPIO.OUT)
GPIO.setup(MOTOR2E, GPIO.OUT)
GPIO.setup(enb, GPIO.OUT)


# --- PWM / SPEED SETUP ---
# Set up Pulse Width Modulation (PWM) on the Enable pins at a frequency of 100Hz
pwmA = GPIO.PWM(ena, 100)
pwmB = GPIO.PWM(enb, 100)

# Start the PWM signals at a 60% duty cycle (motors will run at roughly 60% max speed)
pwmA.start(60)
pwmB.start(60)


# --- MOTOR MOVEMENT ---
# Set direction pins to move the motors.
# Note: The original comment said 'forward', but setting 1B/2E HIGH and 1E/2B LOW typical moves them.
# Change these combinations if your specific robot drives backward instead of forward.
GPIO.output(MOTOR1B, GPIO.HIGH)  # Spin Left Motor in direction 1
GPIO.output(MOTOR1E, GPIO.LOW)

GPIO.output(MOTOR2E, GPIO.HIGH)  # Spin Right Motor in direction 1
GPIO.output(MOTOR2B, GPIO
Bill of Materials
Here’s where you’ll list the parts in your project. To add more rows, just copy and paste the example rows below. Don’t forget to place the link of where to buy each component inside the quotation marks in the corresponding row after href =. Follow the guide here to learn how to customize this to your project needs.
| Part | Note | Price | Link |
|---|---|---|---|
| CanaKit Raspberry Pi 4 4GB Starter PRO Kit - 4GB RAM | Minicomputer used to write code and control the robot and cables for connection | $149.98 | Link |
| Raspberry Pi Camera Module | The camera used to detect object | $9.99 | Link |
| L298N Driver Board | Motor driver board to roll the wheels | $6.99 | Link |
| Motors and Board Kit | Basic harware pieces for the robot structure | $13.99 | Link |
| Powerbank (10,000 mAh) | Compact and portable power device with USB-C for Raspberry Pi | $15.99 | Link |
| HC-SR04 sensors (3 pcs) | Used to calculate distance of obstacles | $6.99 | Link |
| Basic connections components kit | All the necessary parts for connections such as: breadboard, jumper wires, resistors, and LEDs | $9.99 | Link |
| Wireless Mouse and Keyboard | A separate mouse and keyboard is needed to use Raspberry Pi | $19.99 | Link |
Starter
The handheld game console has many different games; these games include: Tetris, snake, slot machine, and more. I was able to learn about soldering and how it is used to make conductive joints for the eletricity to pass through. The game console was made up of a circuit board that is connected to a battery pack through wires, with buttons and screen soldered on it. A challanged that I faced is that I accidentally soldered a button diagonally instead of it being straight. Later, I fixed this issue by keeping the screws of the cover loose which would allow me to be able to press the button properly. This was an amazing project to work on and build up the basic skills needed for my Ball Traking Robot project.
Other Resources/Examples
https://samvit-kini.github.io/Samvit_BSE_Portfolio/ https://deringur.github.io/BSE_Derin_Portfolio/#schematics